New Mobile Site Design

Jen Phillips
product-updates
Our new and improved mobile design is now live.
...
We’re excited to announce our newest feature, which we called “timelines”. Timelines are meant to see how multiple tags relate to the scenes in your story at the same time. We envision a lot of different use cases for timelines, including:
Timelines are kind of a generalization of the complicated “subplots” view we’ve seen in some other writing products, but more versatile and way easier to use. Most other products provide subplots as a separated plotting tool that does not stay in sync with your manuscript. In contrast, Fablehenge timelines integrate with the tags so that your timeline view shows the same data as the outline view.
Let’s have a look! Like Relationships, which we released this summer, Timelines are a new top-level menu item in the left side bar. You can set up as many timeline views as you like. If any timelines feature the same tags, they will stay in sync with each other.
Here’s a timeline view for the three main characters in my current work in progress:
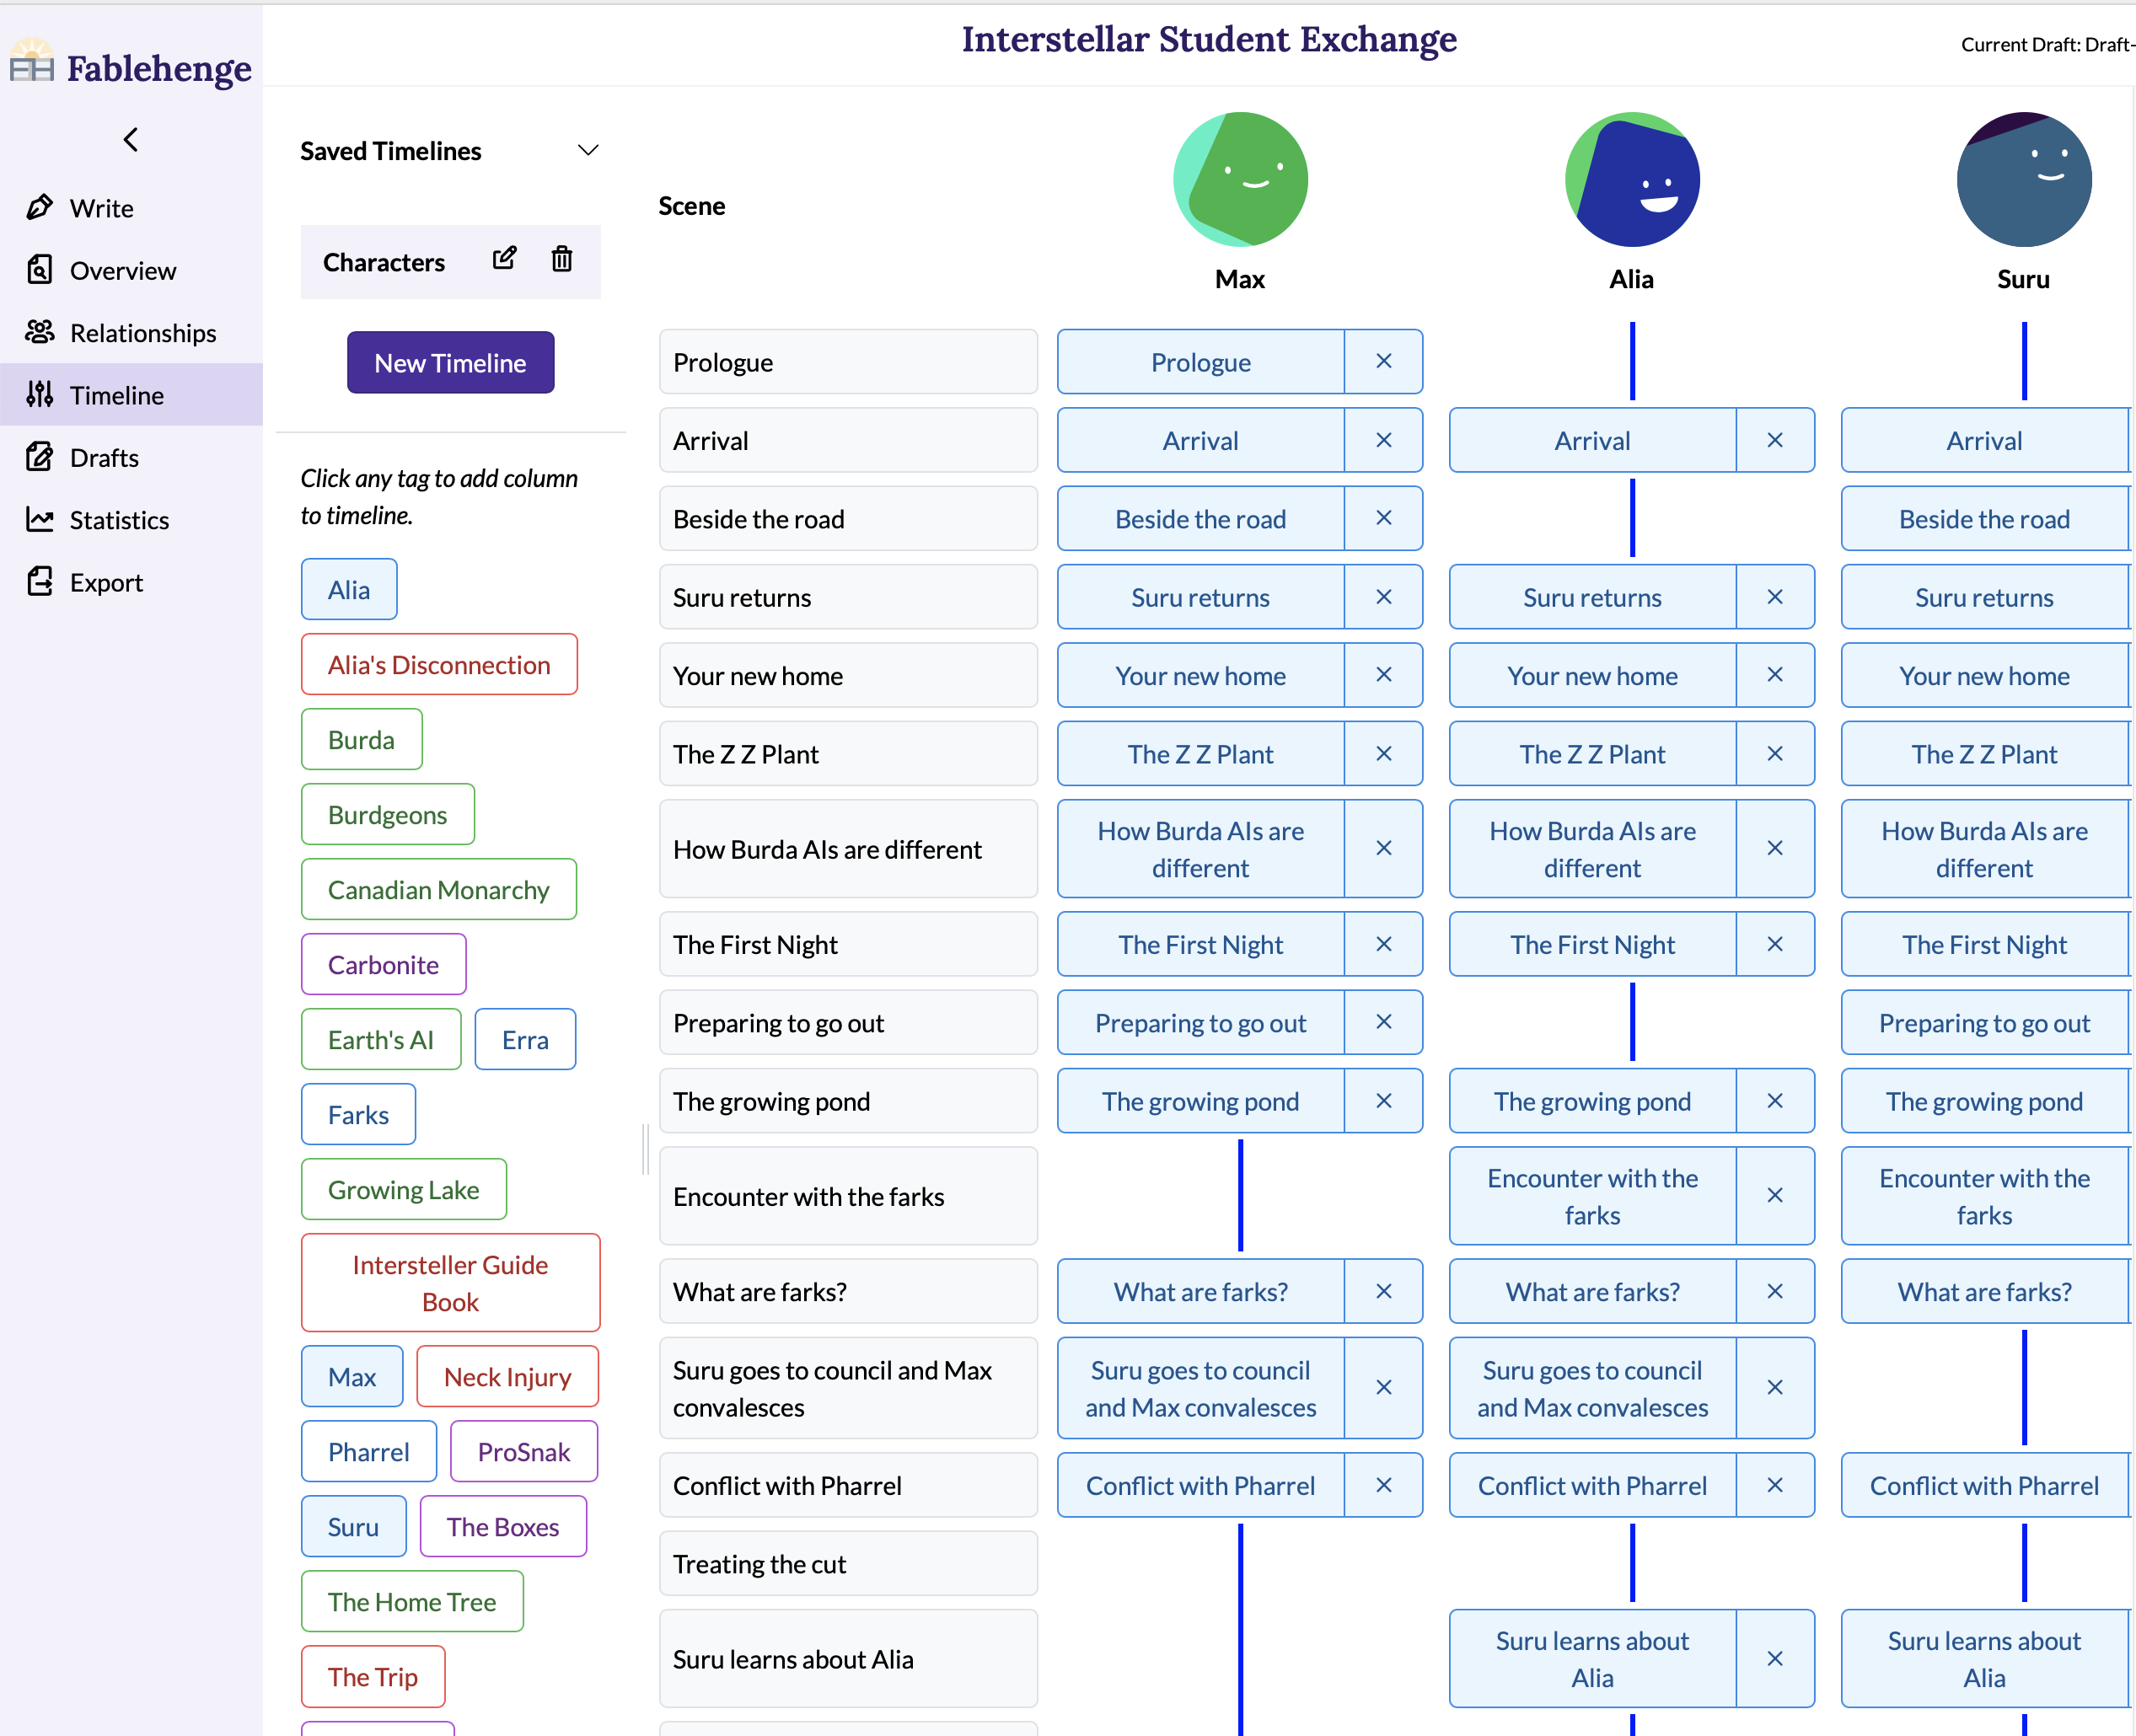
Notice that “Timelines” is selected in the side navigation area. The timeline view beside it has a left column where you can create and edit timelines at the top (I only have one timeline right now, and I named it “Characters”), and a scrollable list of all the tags in the selected story below it. You can drag and drop the slider widget to make this column wider or narrower, or to hide it altogether once you have finished selecting tags.
I’ve selected three characters by clicking on them in this left sidebar. As I select characters, they are added as new columns in the “matrix” view on the right.
That matrix has one column per selected tag, and one row per scene in your outline. At the intersection of all these rows and columns, we can see whether or not the tag has been tagged in that scene.
Let’s see an example of why this is helpful. Have a look at the “Encounter with the farks” scene, about halfway down the screenshot. I have tagged Alia and Suru in this scene, but I didn’t tag Max. This is an oversight; Max is my POV character for the entire book and should therefore be tagged in every scene.
I can quickly remedy that by clicking the open space where the “Max” column and “Encounter with the farks” row intersect. It will fill in with a box indicating that Max is now tagged in that scene. If I go back to the write page, I would see that the scene now also has this tag.
To remove a tag from a scene, click the “x” icon beside it in the timeline matrix. You can also click any scene title to be taken to the write page to start editing the scene.
If I create a new timeline that includes some of the settings in my app, I immediately discover that I haven’t tagged settings as assiduously as I have characters:
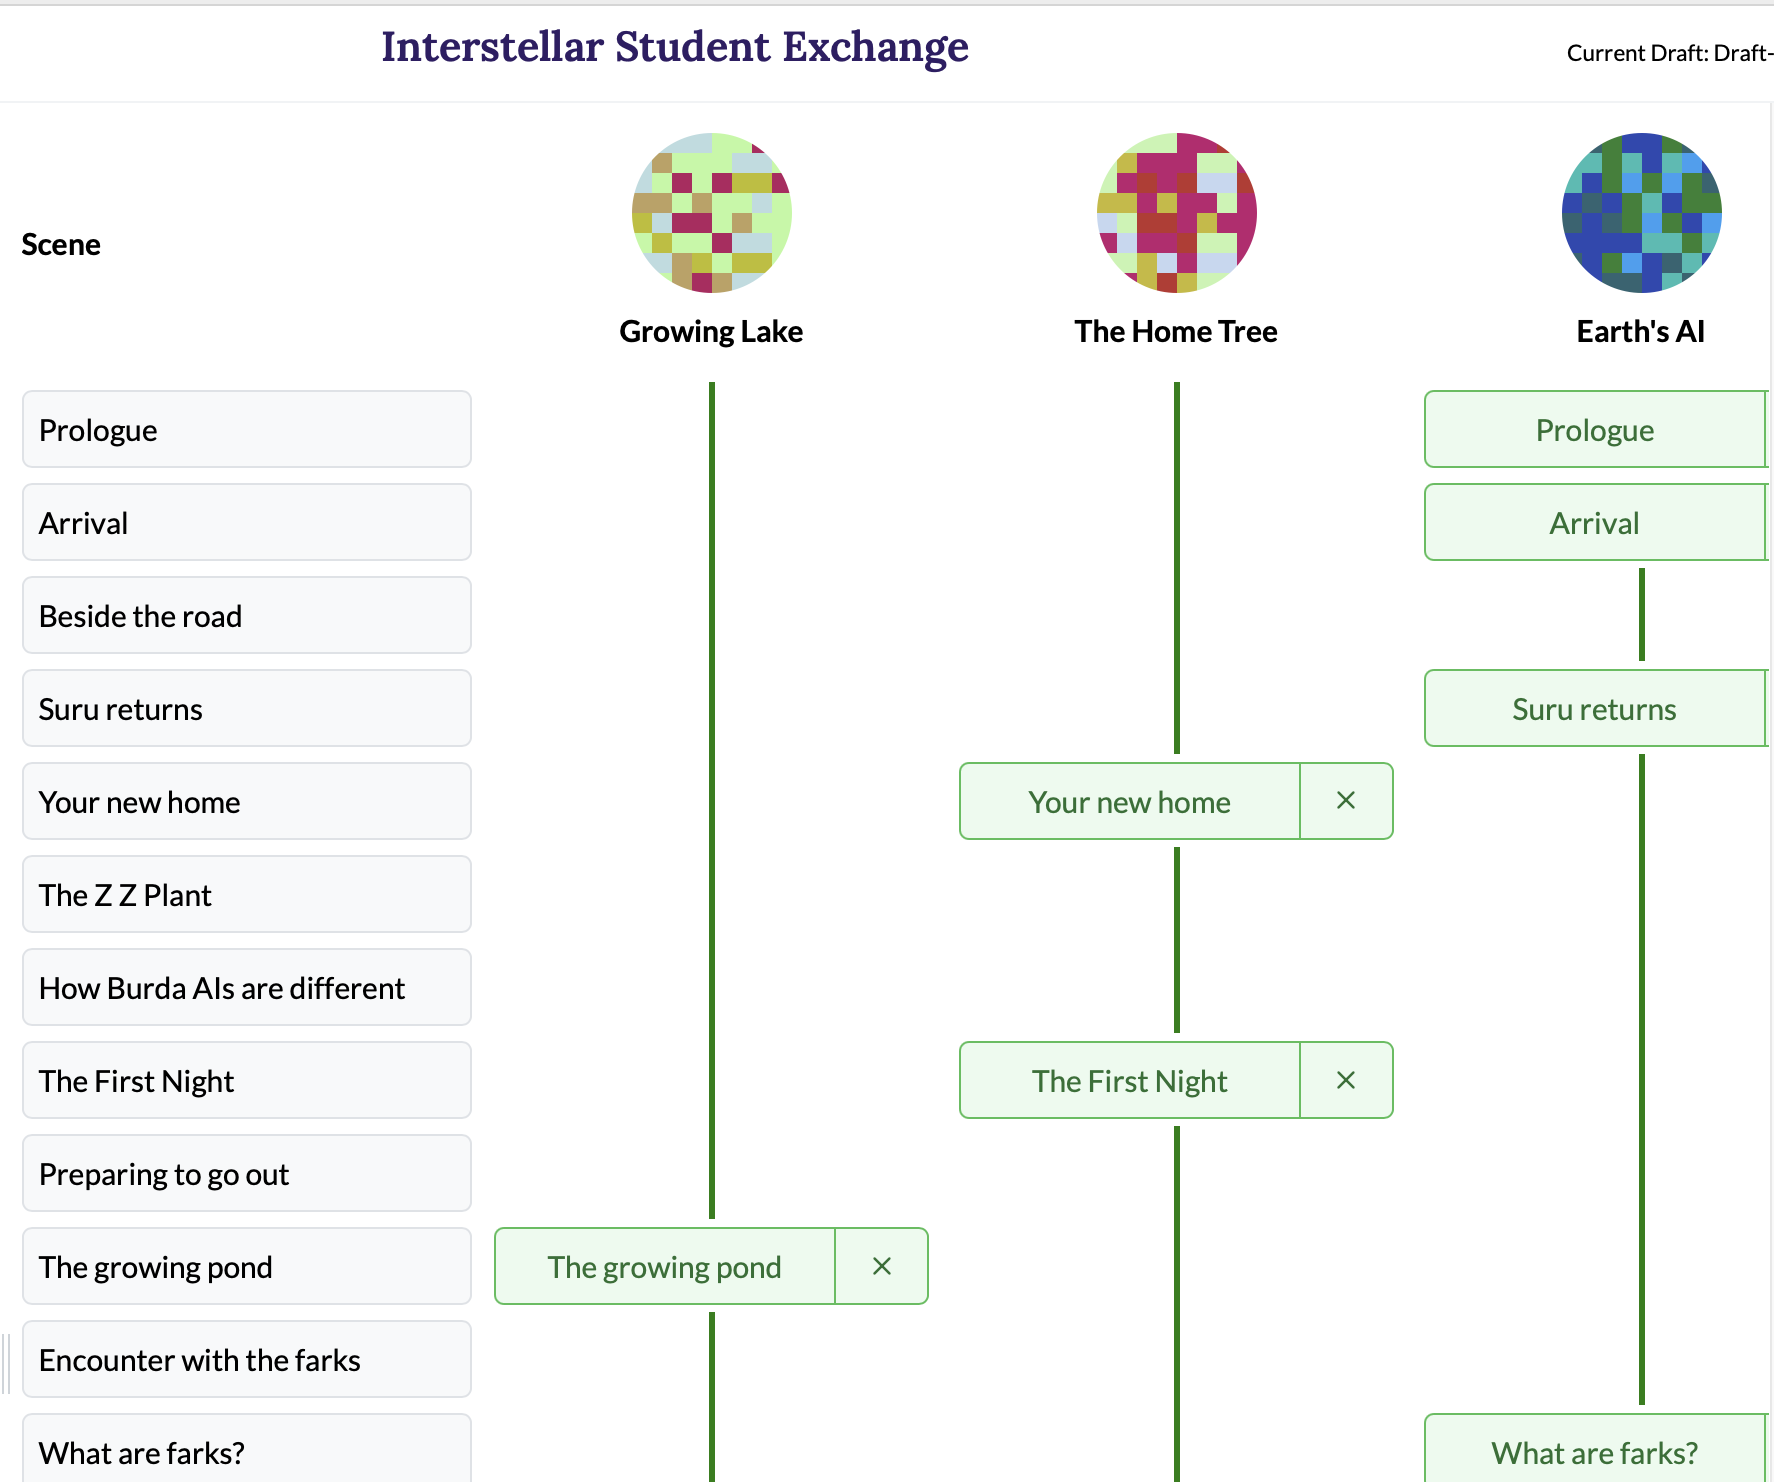
I can see immediately that I haven’t defined tags for as many settings as the book actually contains. I also haven’t done a very good job of tagging the “The Home Tree” setting as I could have; most of the early scenes take place in that location.
Here’s another example, this time with subplots: By selecting “Max” and the “Neck Injury” subplot, I can quickly see that I forgot to mention Max’s neck injury (which was sustained when falling off an ATV-like vehicle on a distant planet) in one scene:
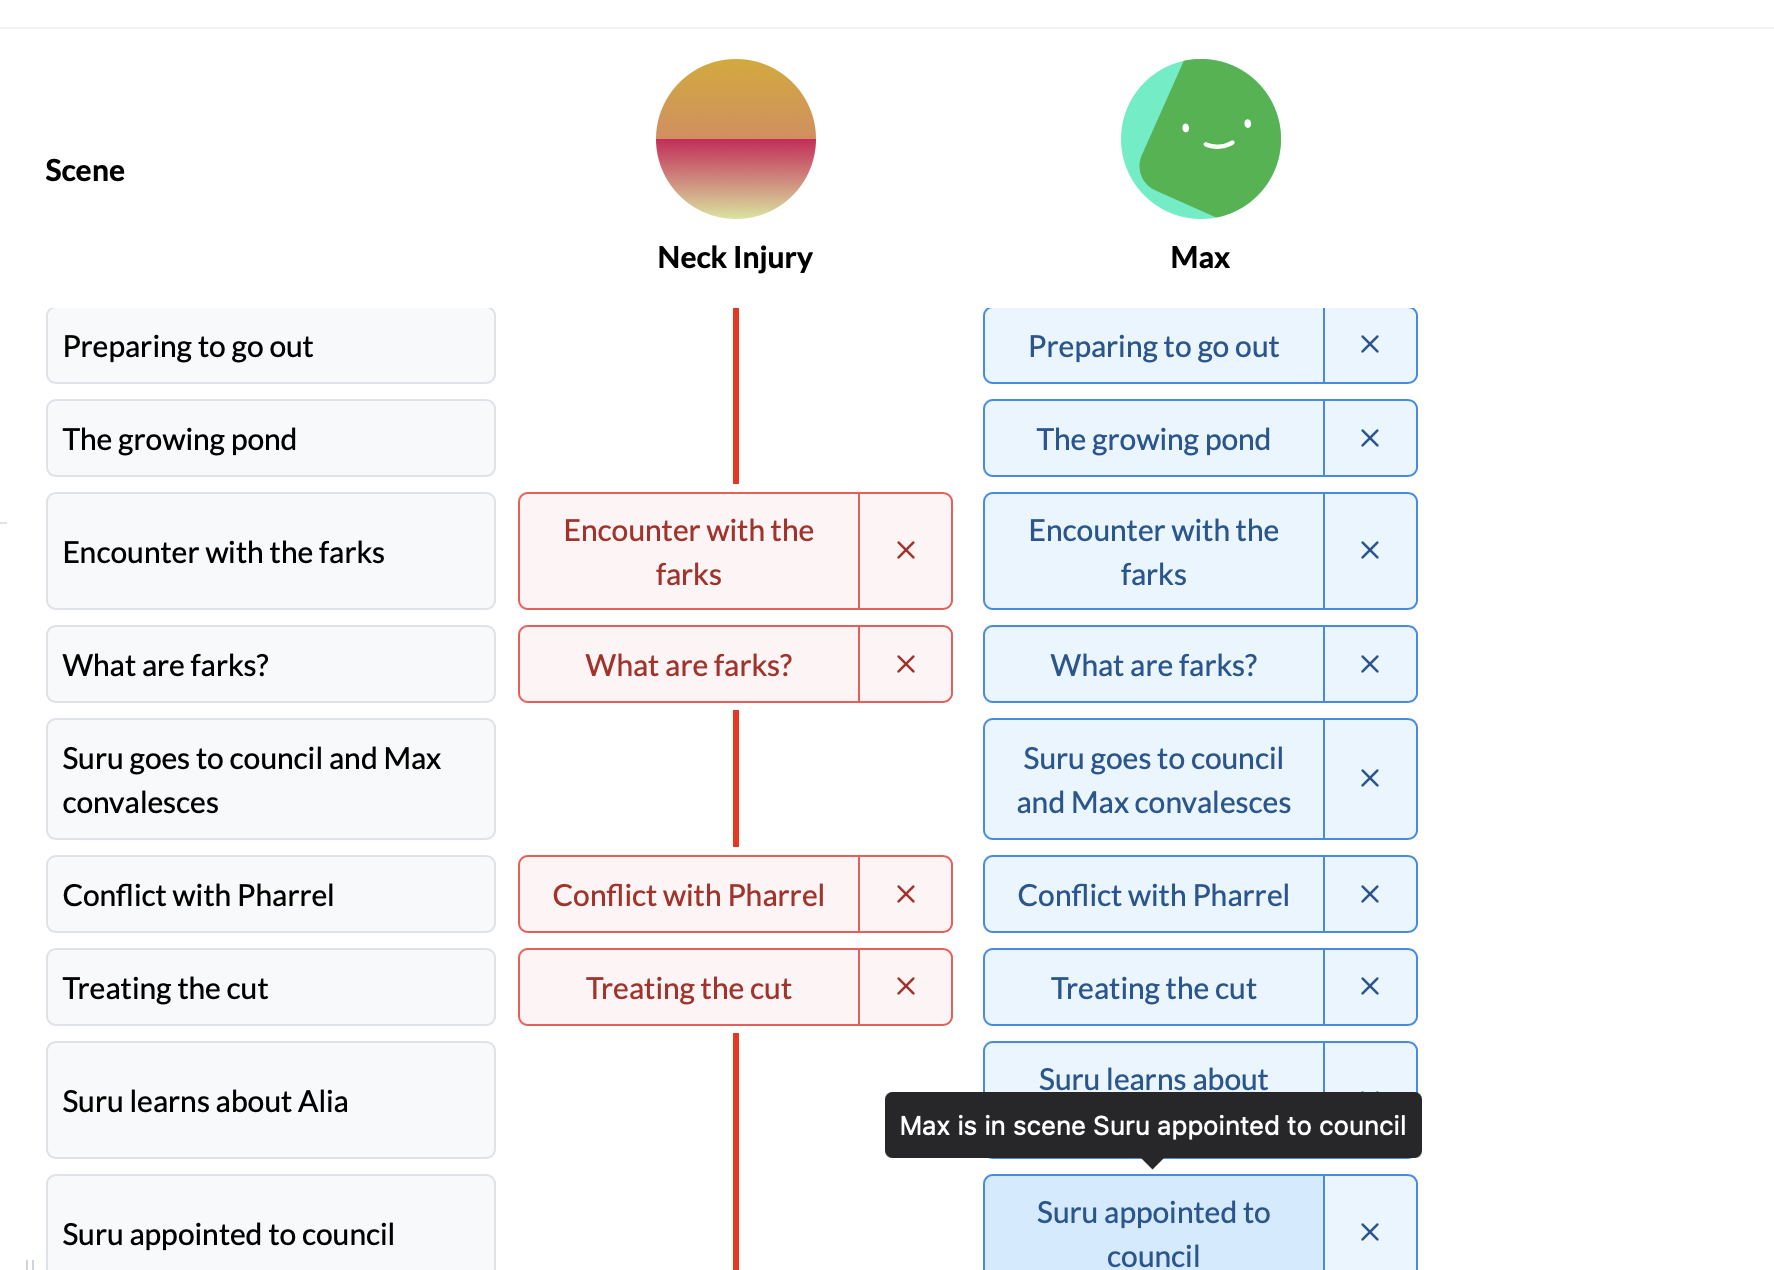
Don’t worry about Max; it’s a minor whiplash injury and it will heal. But I have to remember to mention the progress of his care and any setbacks that might happen (such as being hit in the face during the “Conflict with Pharrel” scene). And I need to remember not to drop the injury storyline altogether until Max is fully healed.
I’ll warp up with a rather embarrassing, but common mistake: forgetting objects and subplots. If I add the “Interstellar Guide Book” subplot to the timeline, I can see that I completely forgot about it after introducing it in the first scene. 20k words later, I have no idea why I tagged this thing as a subplot (feels like it should have been an object) or what I intended to do with it. This view is a reminder that I should reread that scene and either remove references to any loose ends I no longer expect to address, or else remember what I meant to do with it and weave that subplot back into the later story.
The timelines view is deceptively simple to use; we put a huge amount of effort into designing it so you don’t have to put any effort into using it. But as your story evolves, this view will stay in sync with what you have tagged in your manuscript; you never have to worry about maintaining your outline in two different applications or two different views (or between your word processor and a physical cork board).
We expect you’ll find new uses for this view that we haven’t thought of yet. I can already tell I’m going to start adding new tags to the story to make timelines more meaningful, even if they won’t have a lot of detail in the main story view, and I know I’m going to find continuity errors that might otherwise have gone to print!
For more information, check out our documentation on timelines. As always, let us know what we got right or what we can improve!
